

How To Install A Curved Paver Walkway
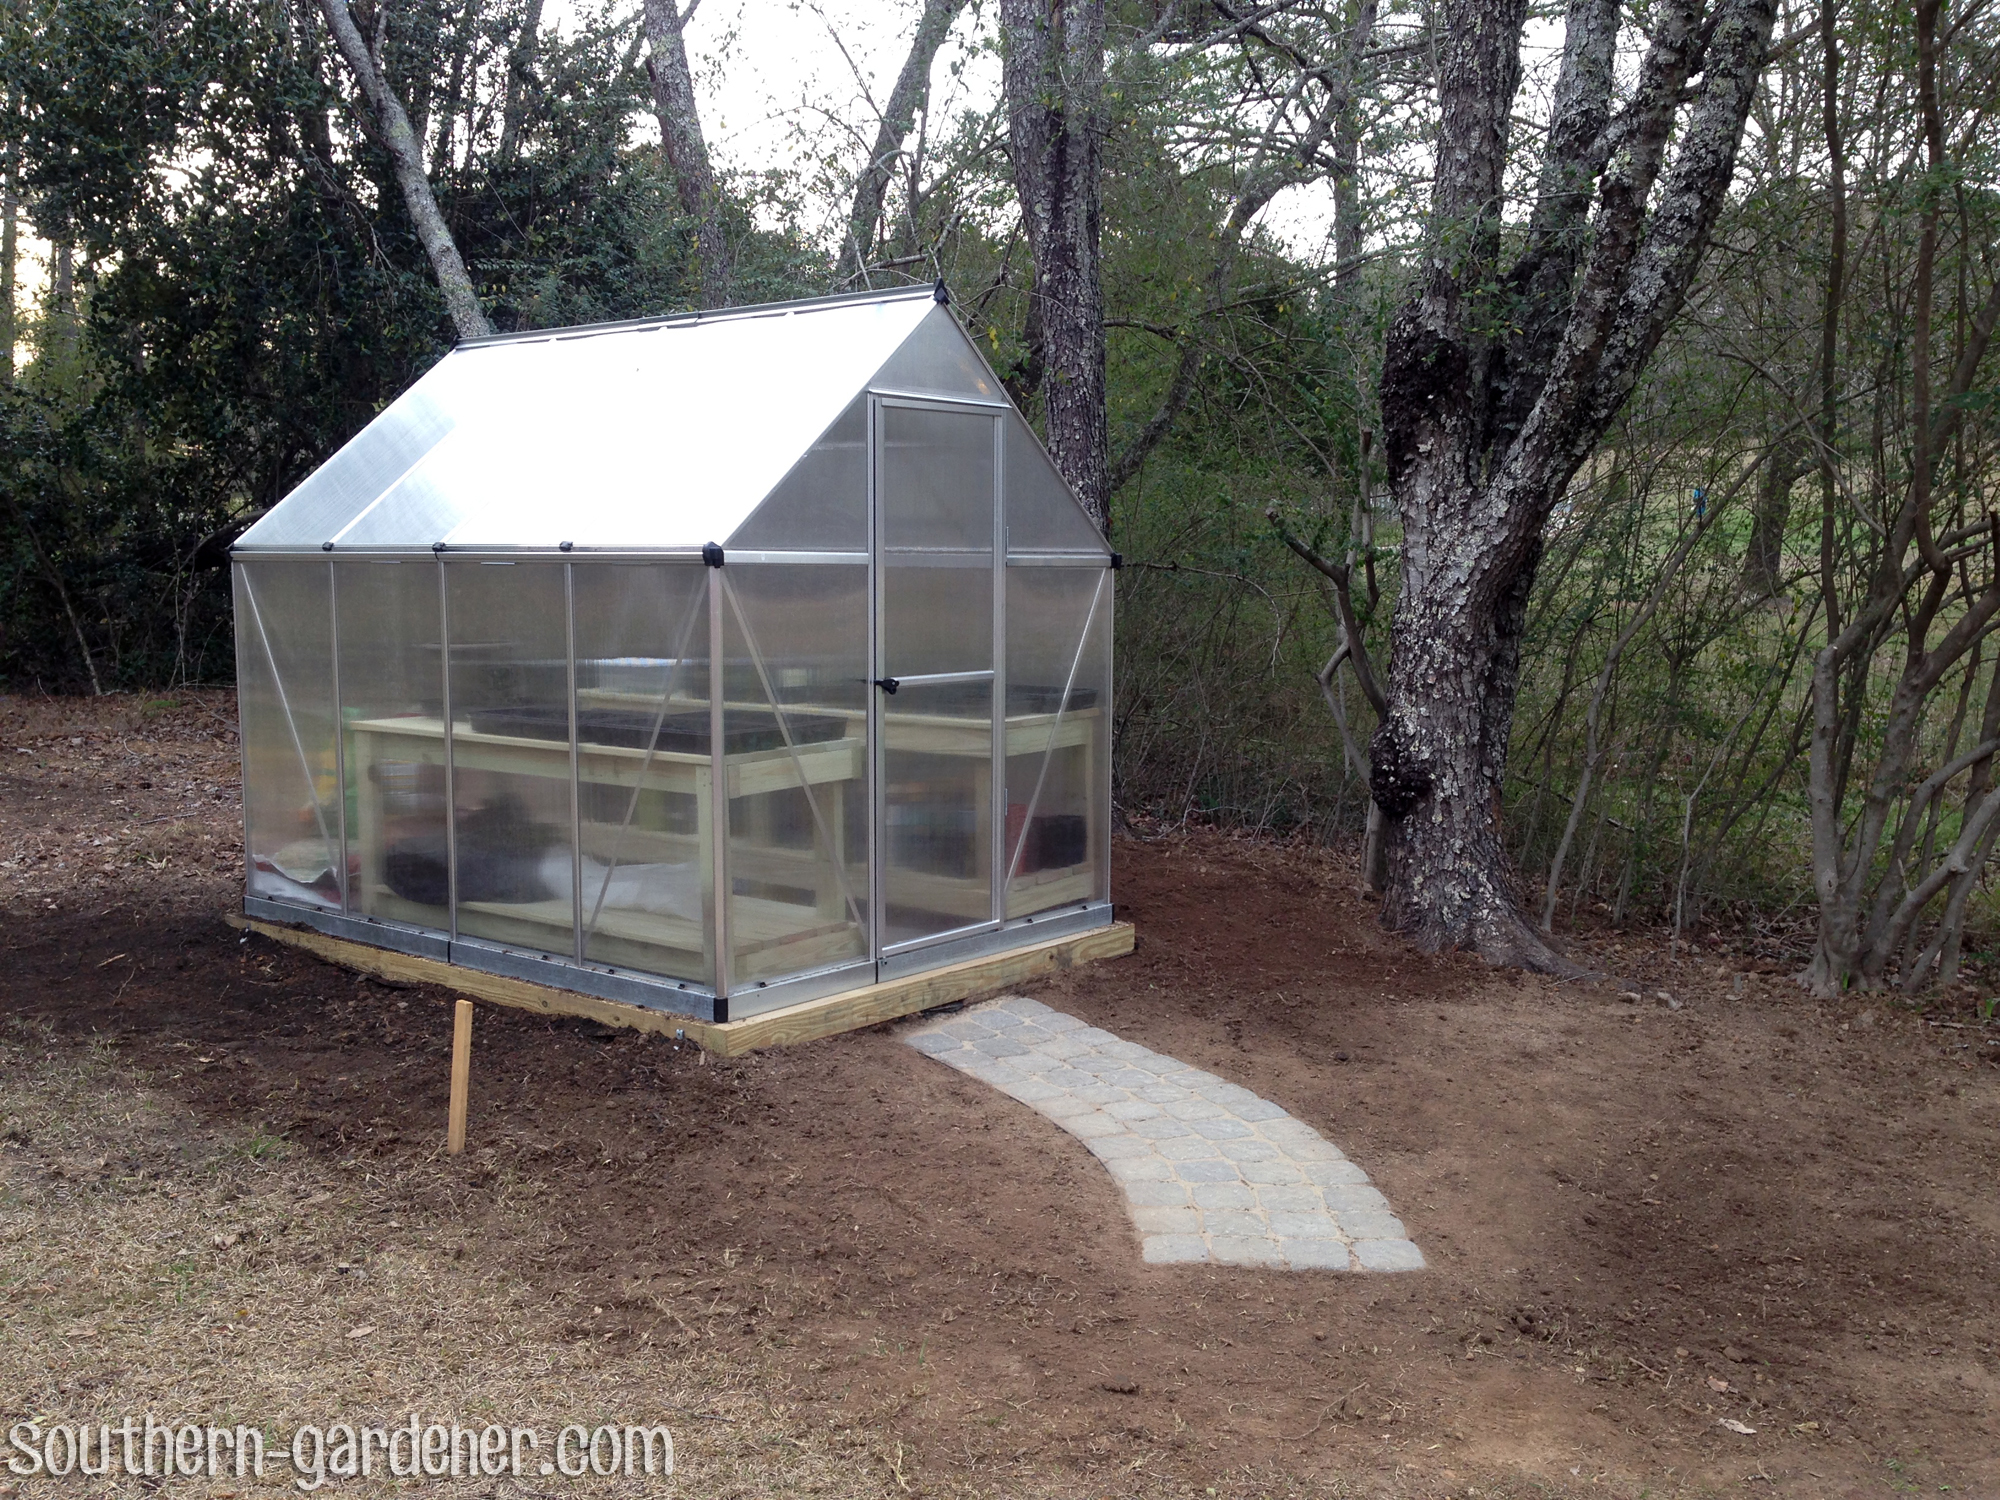
The showtime matter I wanted to do with landscaping was build a curt, curved paver walkway to the greenhouse door. I've never done anything like this before, and so we'll see how well it holds up. I used Lowe'due south tutorial: How to Design and Build a Paver Walkway. My walkway is about 24″ wide since but one person will exist using information technology at a fourth dimension.
Lessons learned:
- E'er dig wider than you retrieve you'll need. I originally didn't go out wide enough, then when information technology was time to install the paver edging, I had to dig more. 😕
- Don't skip the part in the tutorial where you lay downwards 1″ PVC pipe to level out the area past running a two×4 over the tops of the PVC. If I'd done this, it would have saved me a lot more time with the leveling part. I. Detest. Leveling. Stuff.
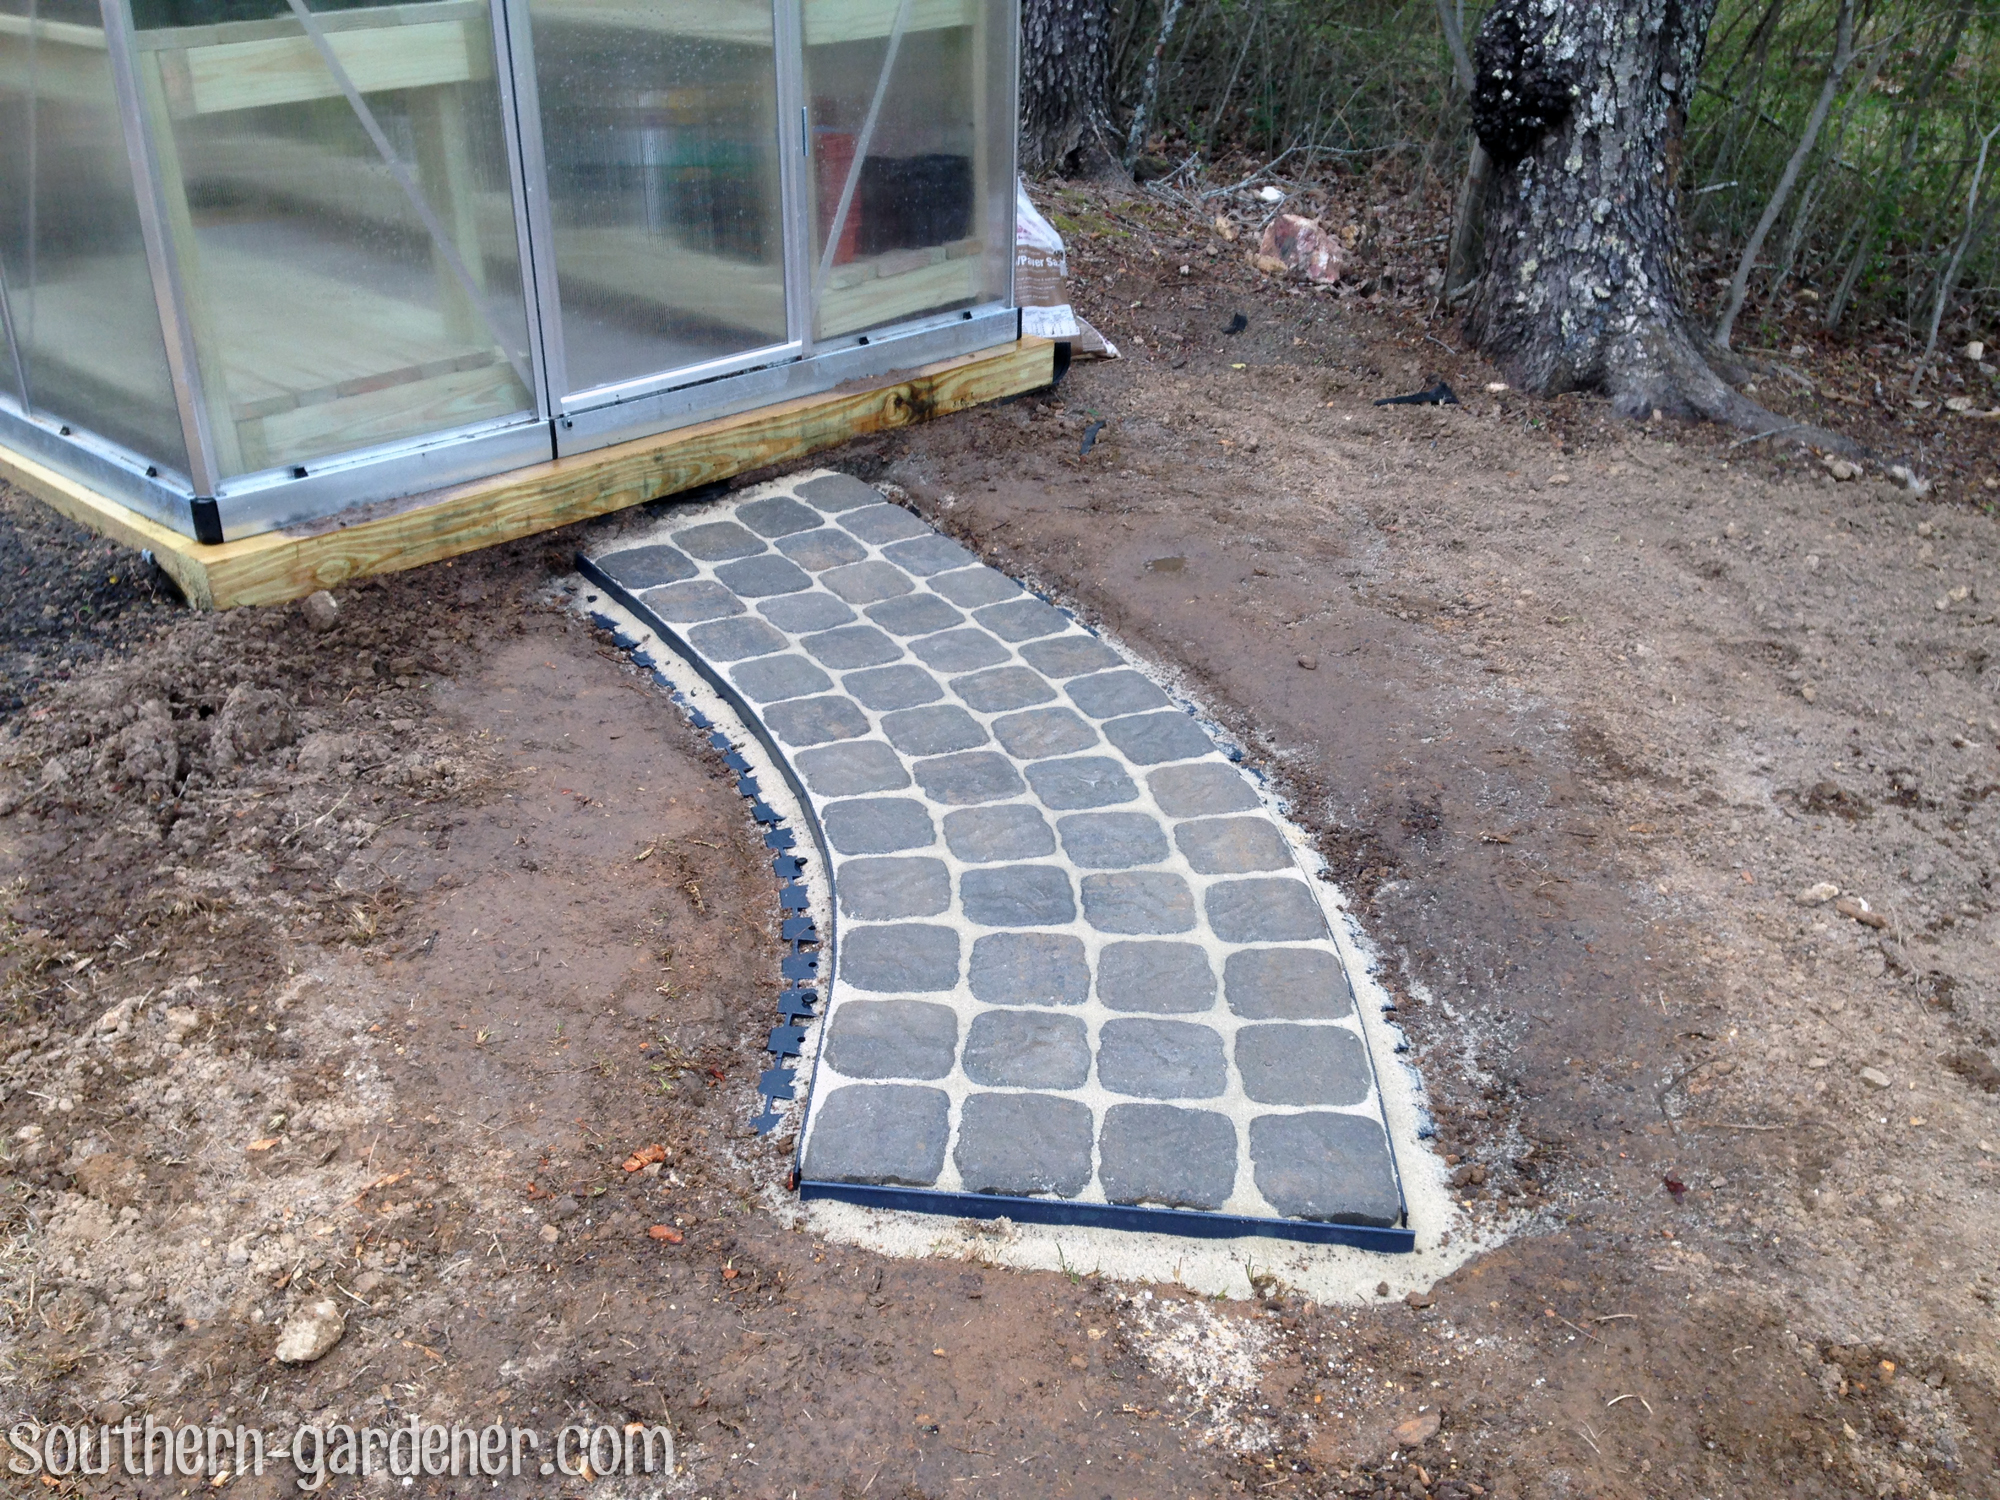
The first thing I wanted to practise was go a general thought where the pathway would lay. I was two bricks short, so I had to go dorsum and get those the next day, along with some other supplies. These pavers are 5.8″ x v.8″ by 1.seven″ loftier. To do the curve and make the ends come out fifty-fifty, information technology took a lot of finessing and rearranging. The left row is 11 pavers long; 2d row is 12 pavers; third row is 13 pavers; quaternary row is 14 pavers.
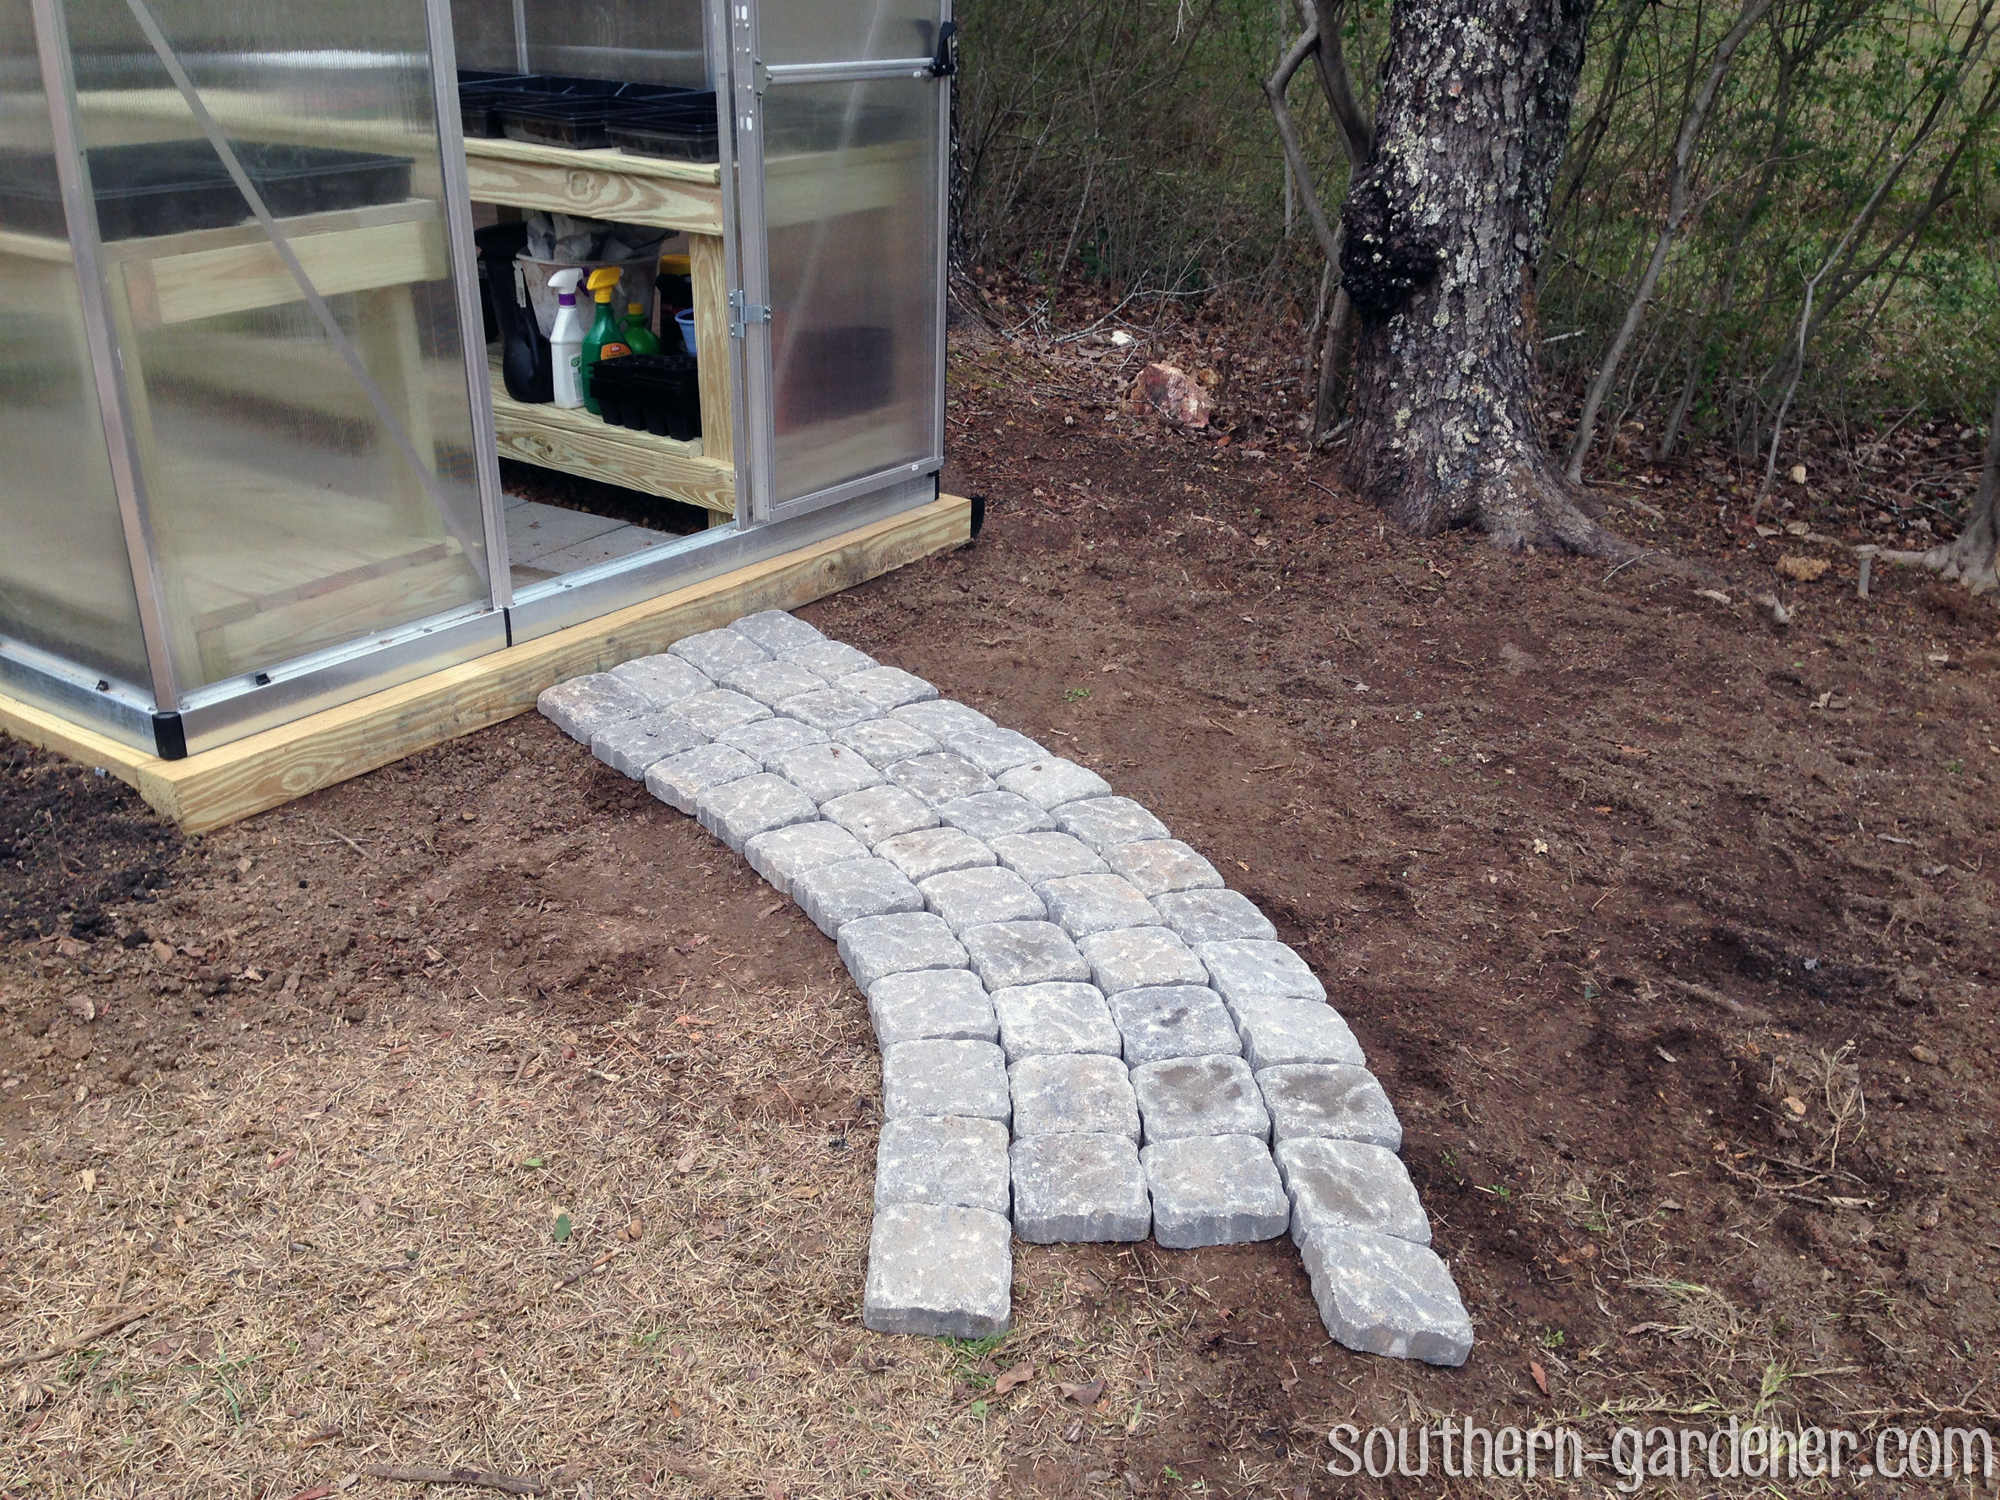
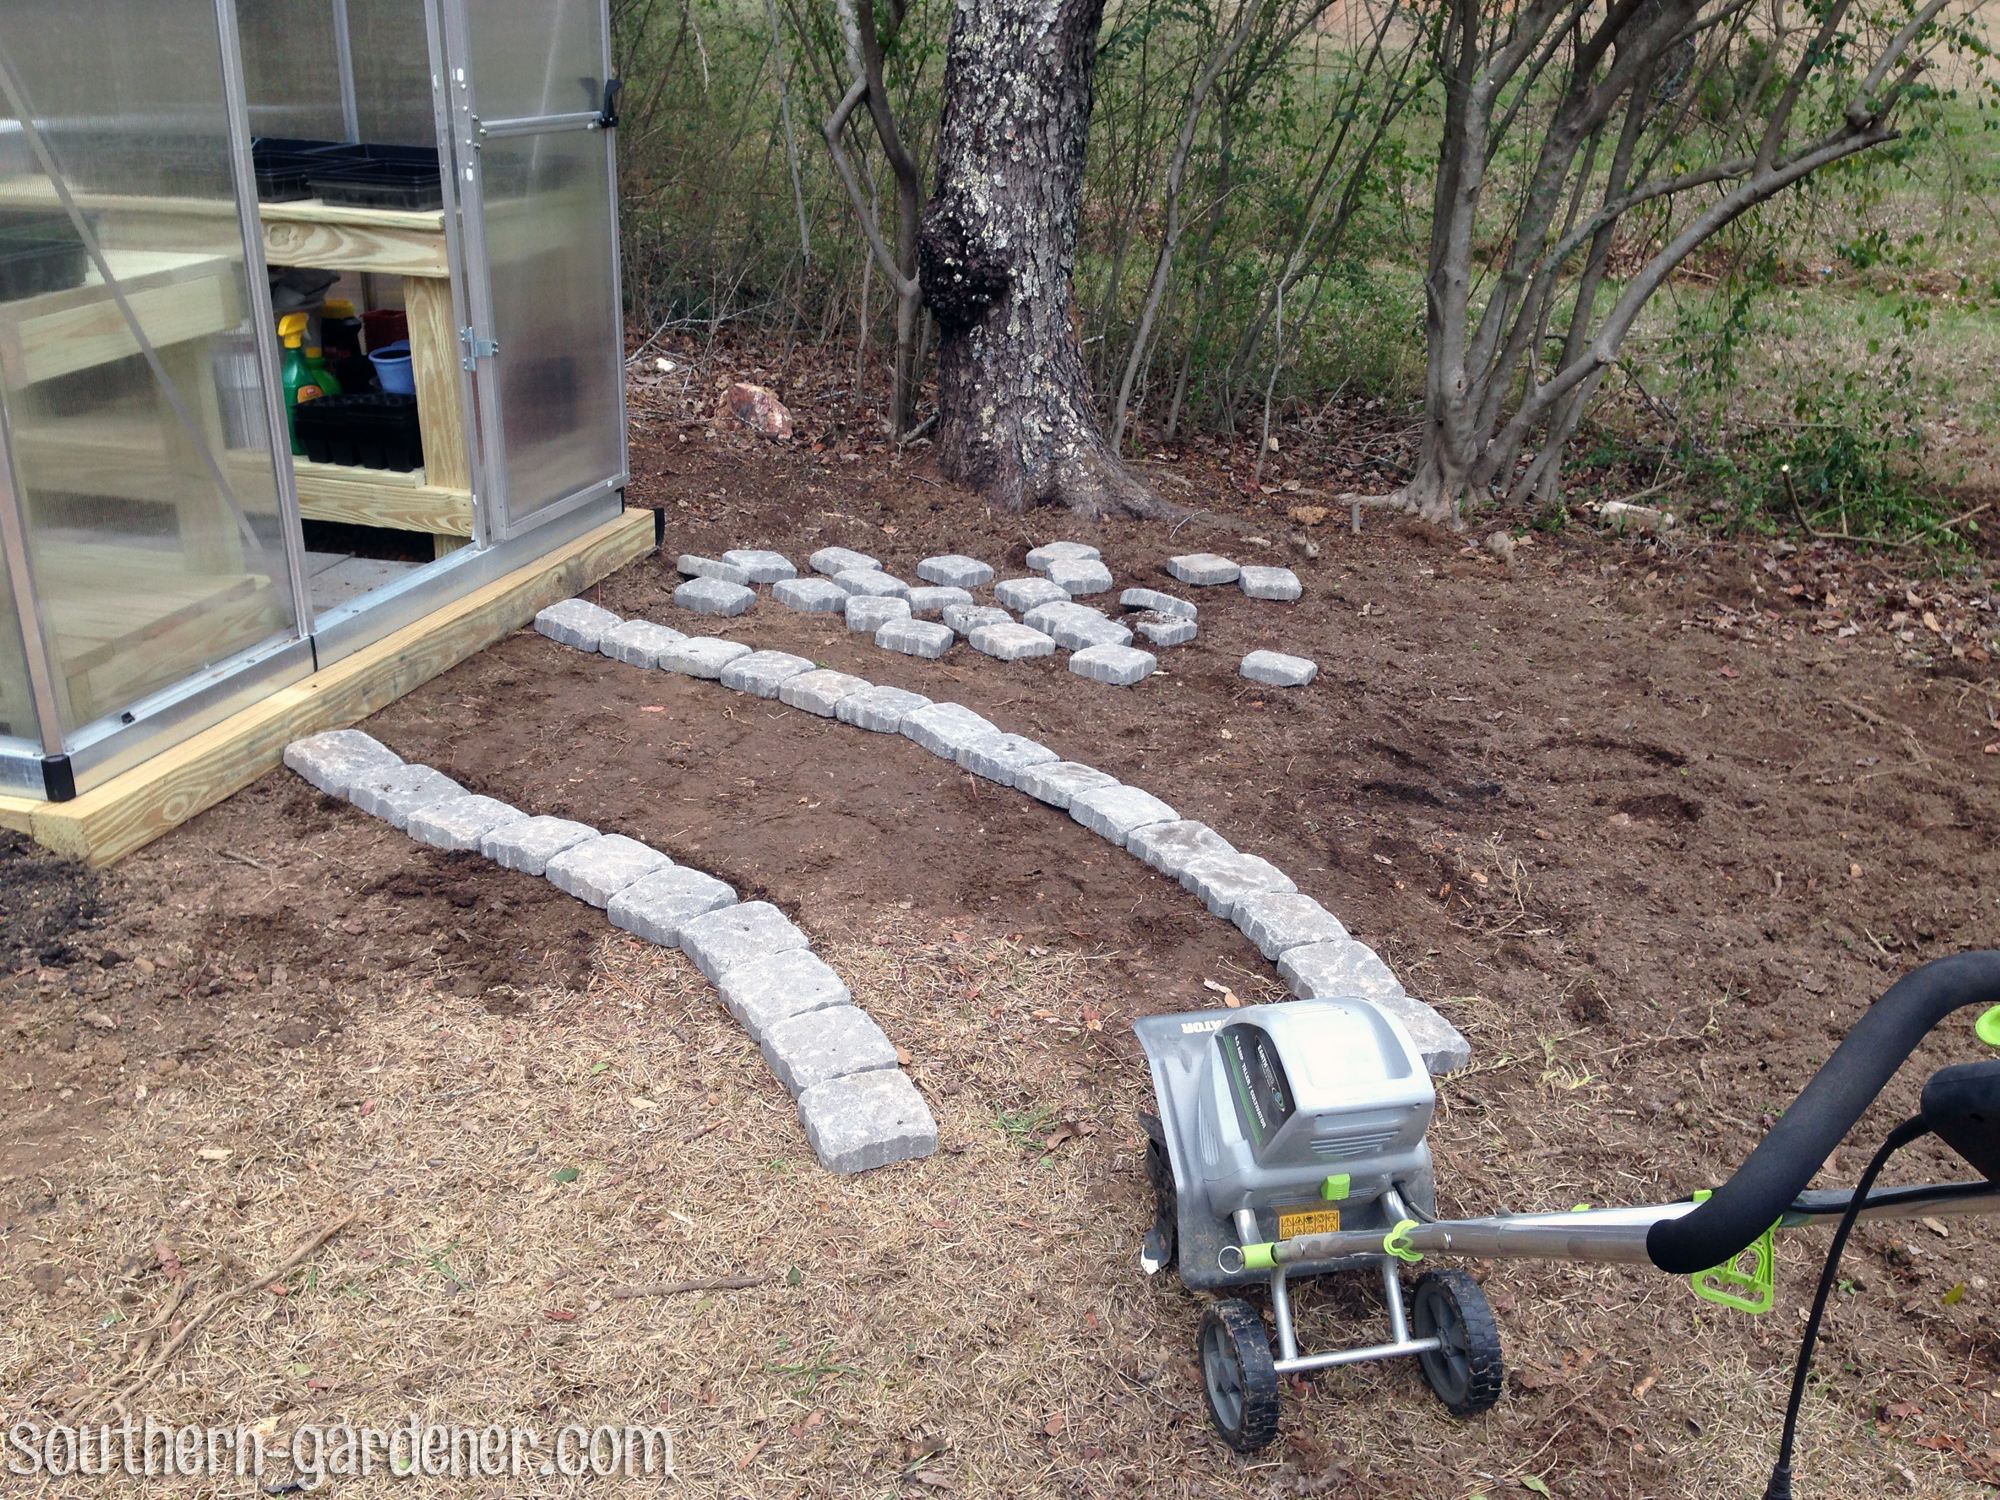
And so I moved the outer edges over 1 brick and moved the inner pavers out of the style so I could employ my tiller to do the earthworks for me. I should have moved the outer pavers over two pavers width to adapt the edging.
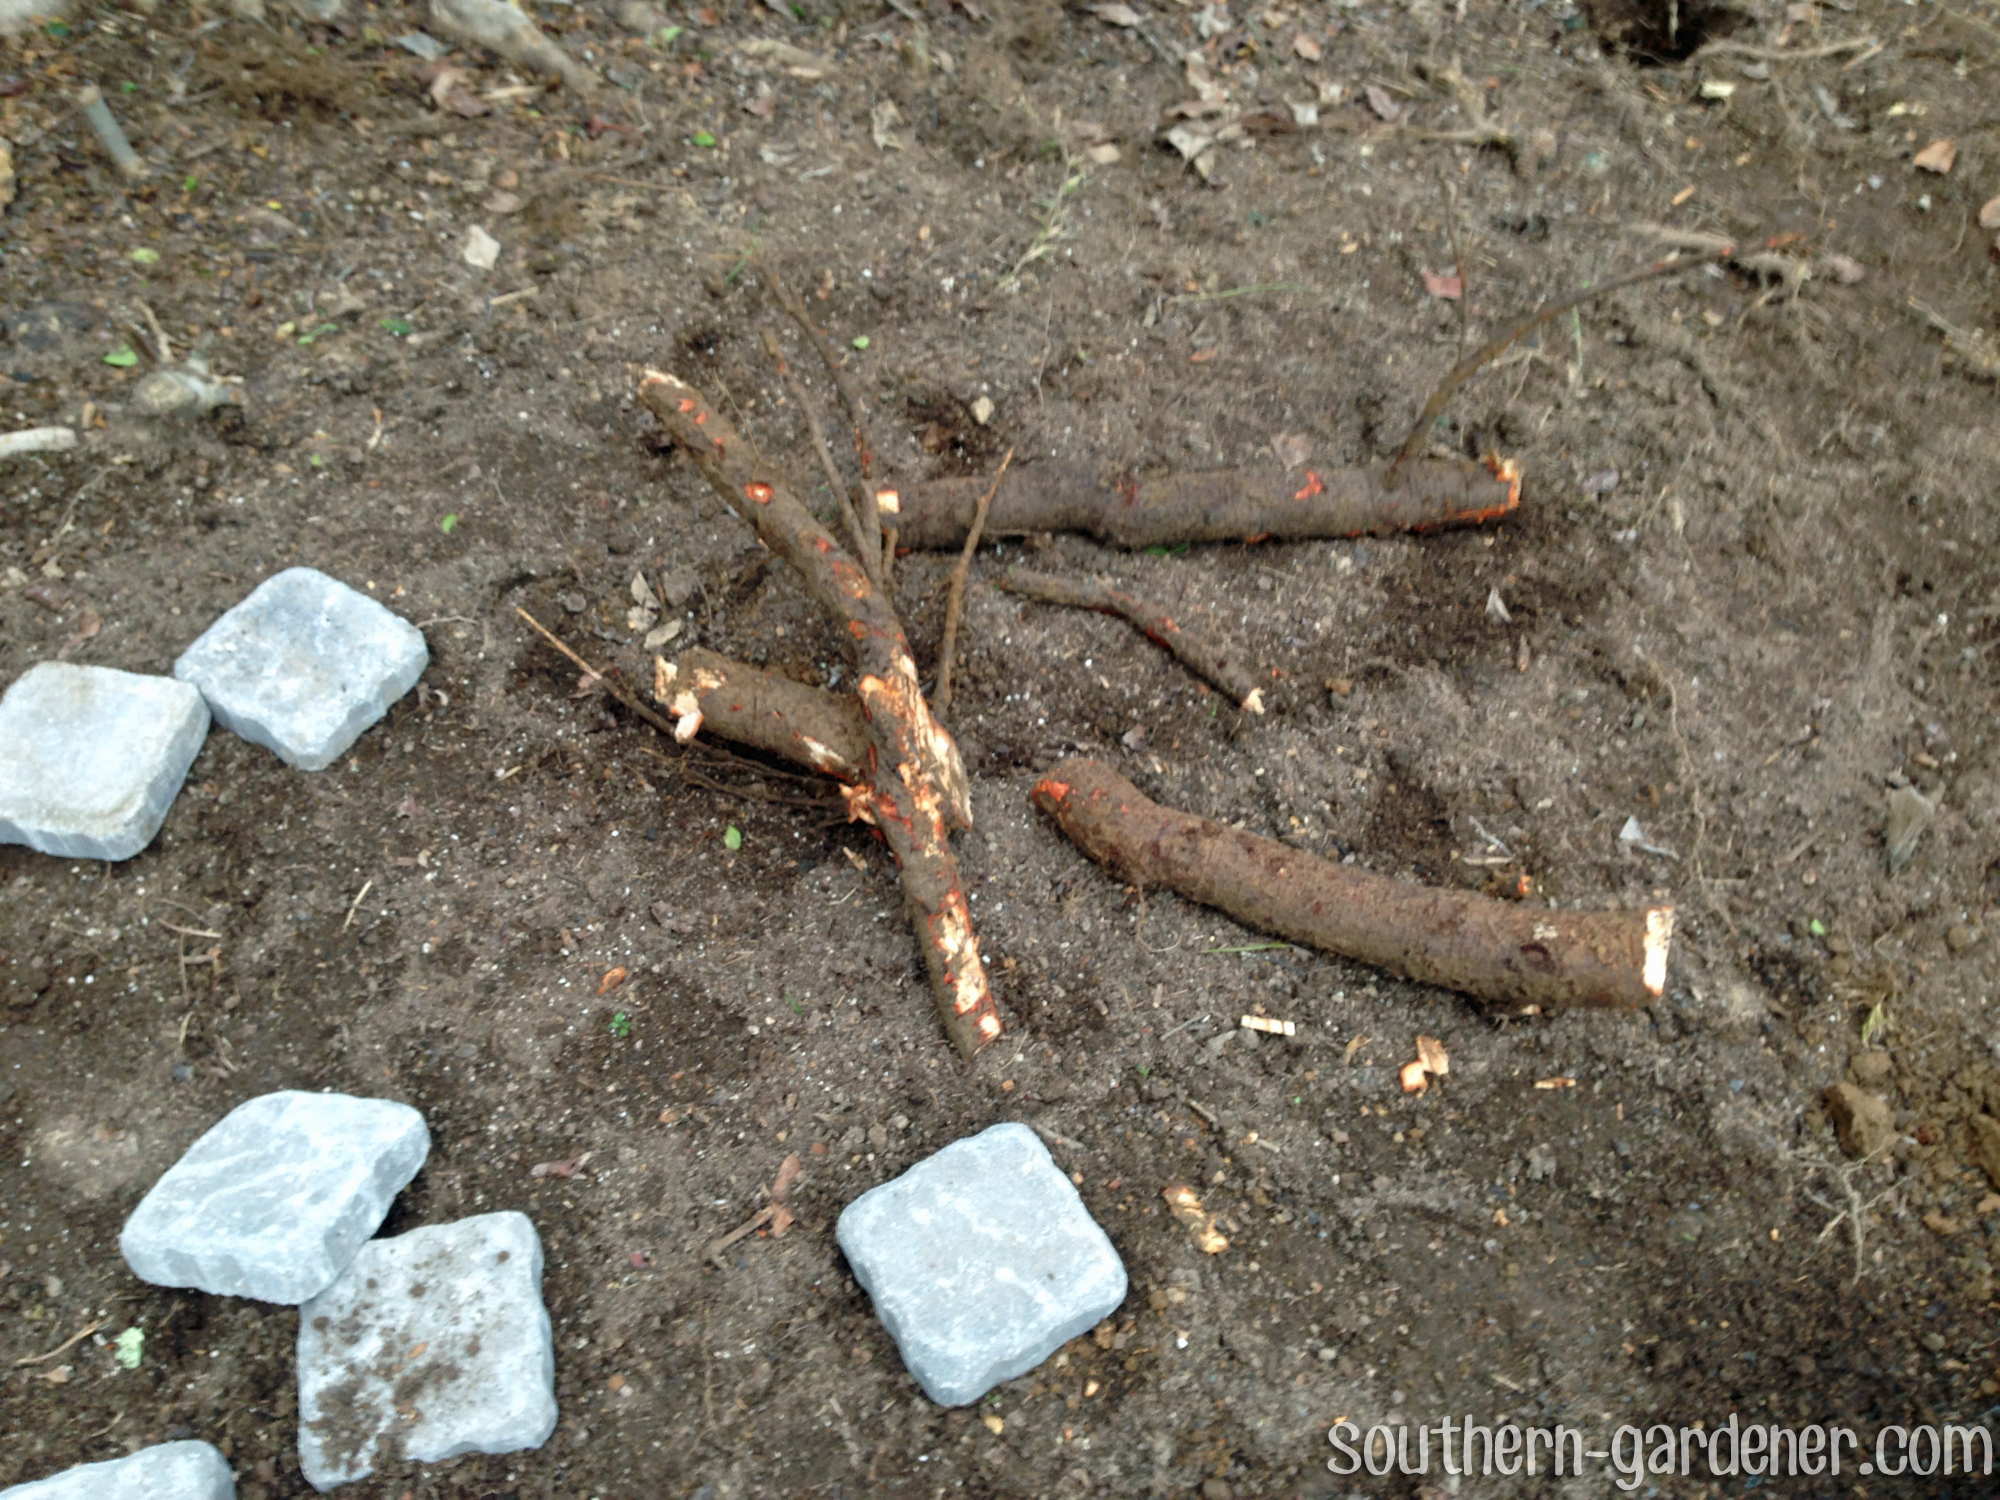
I love this tiller, but it won't chomp through really thick roots. Sticking to the theme of things non being that easy for me with this greenhouse, I ran into some large roots where I wanted my walkway to go. Of grade. The picture show doesn't even do them justice.
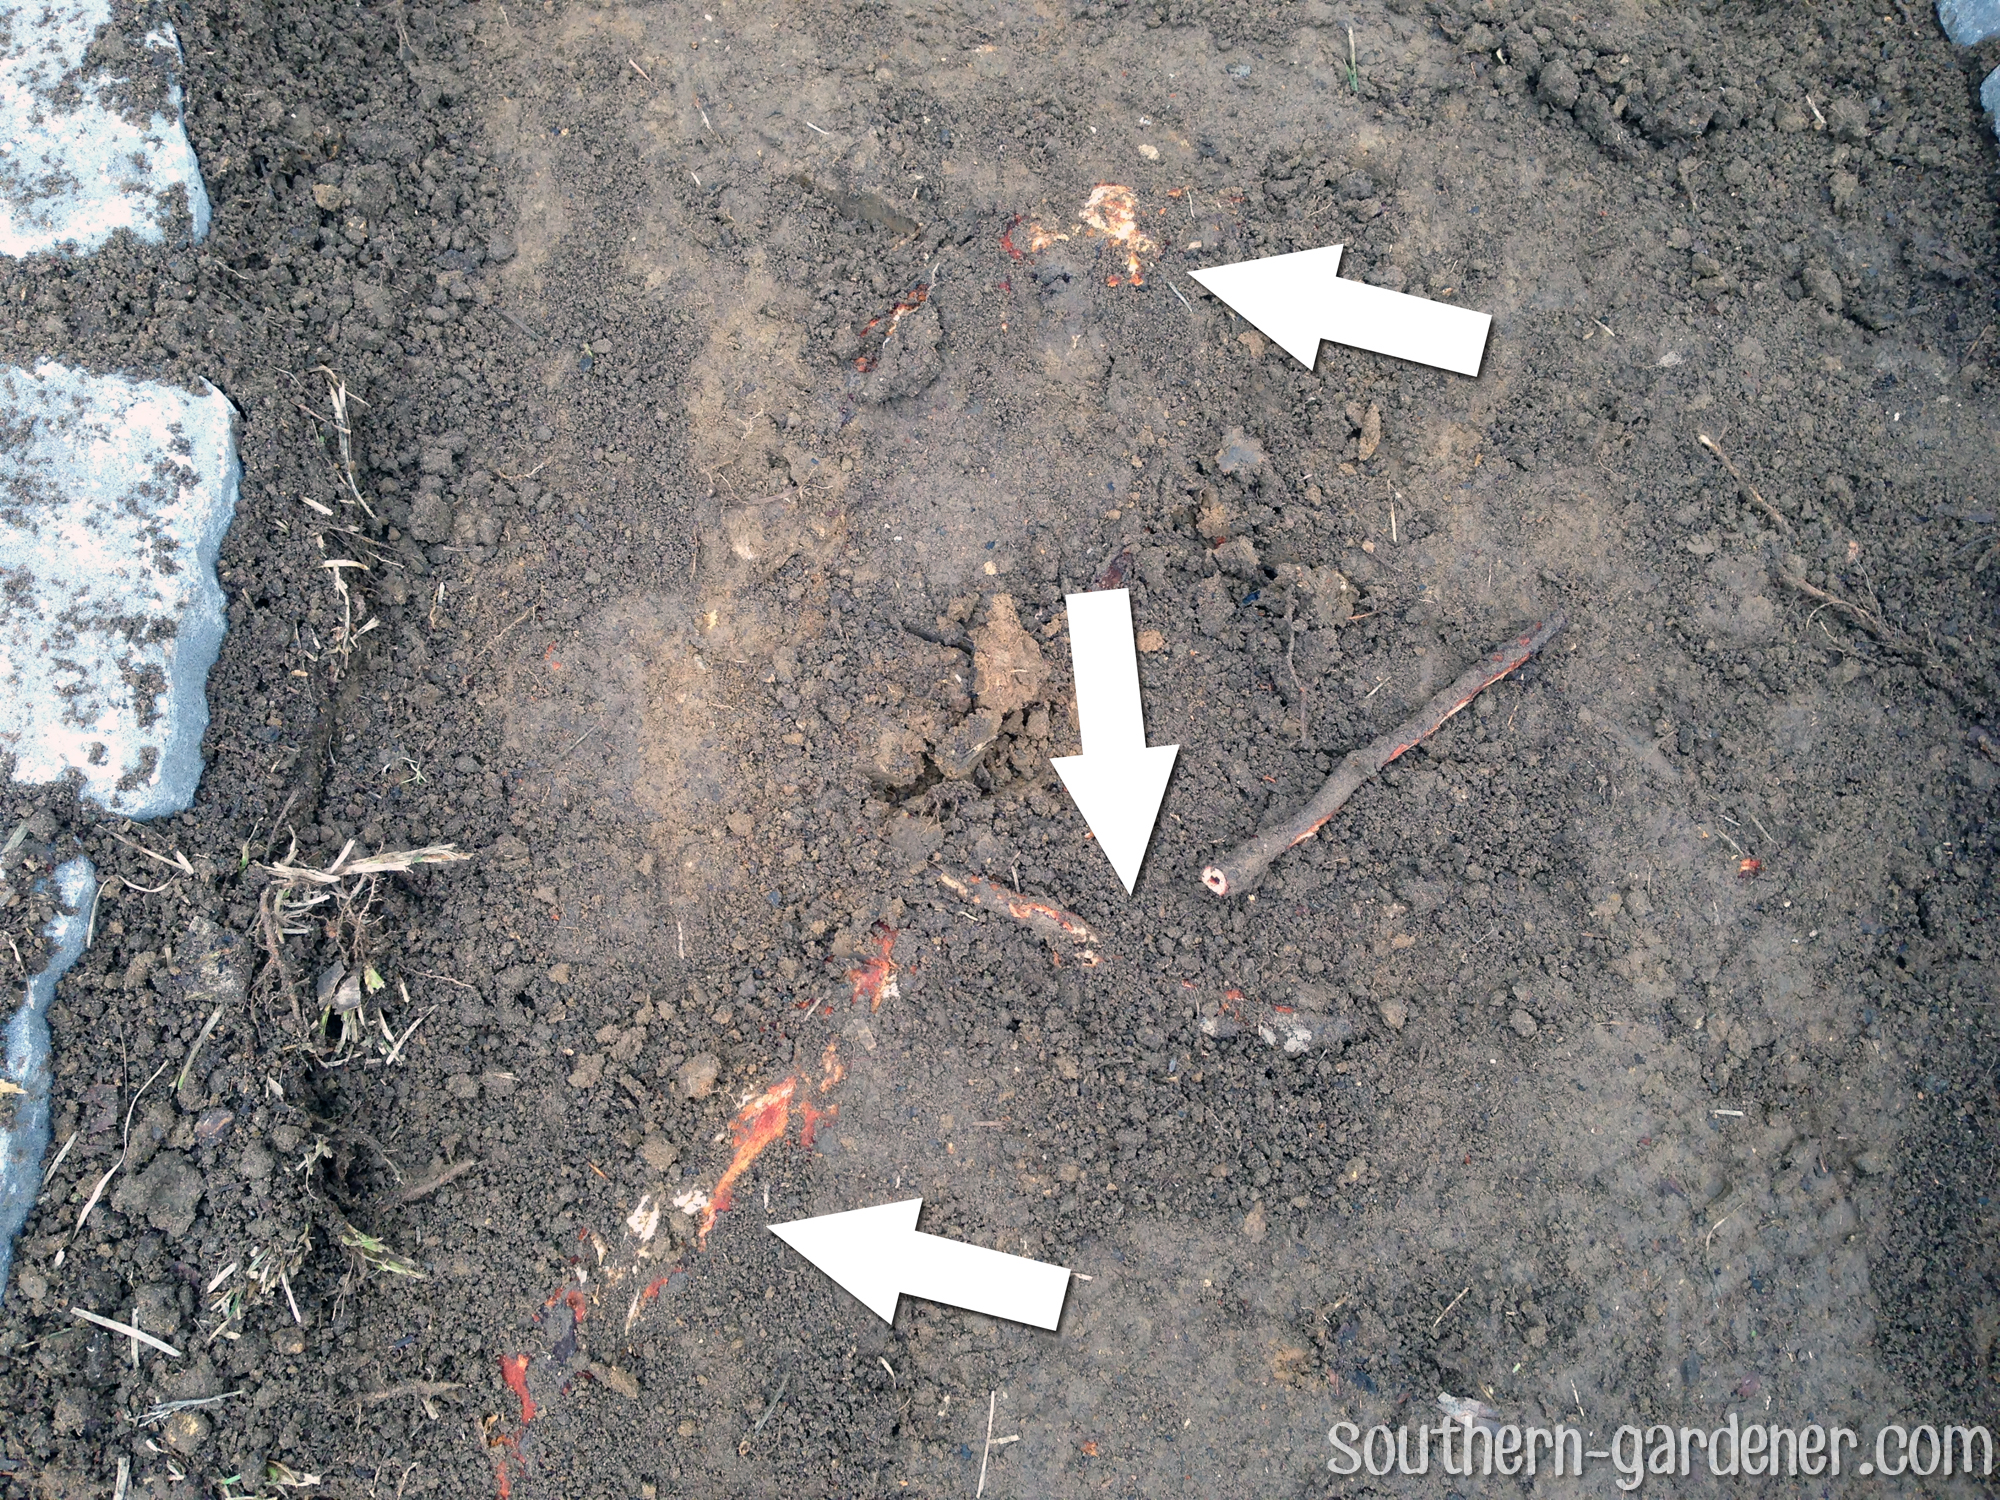
So I had to take hold of my axe and first chomping away until I was able to get them up. What a workout I got that twenty-four hours! I hated doing this because information technology took up style too much of my fourth dimension that day, just I got information technology done. Again, the picture below does non do the roots justice. I should accept taken a moving picture holding them so you lot could see how big they were. Those pavers are a square 5.8″ to give you lot an idea.
Once that was done and I somewhat had it level and sloping abroad from the greenhouse, probably more was directed in the Lowe's video, I put down paver leveling sand and paver bases I purchased (so I wouldn't have to dig so deep and use gravel under the sand).
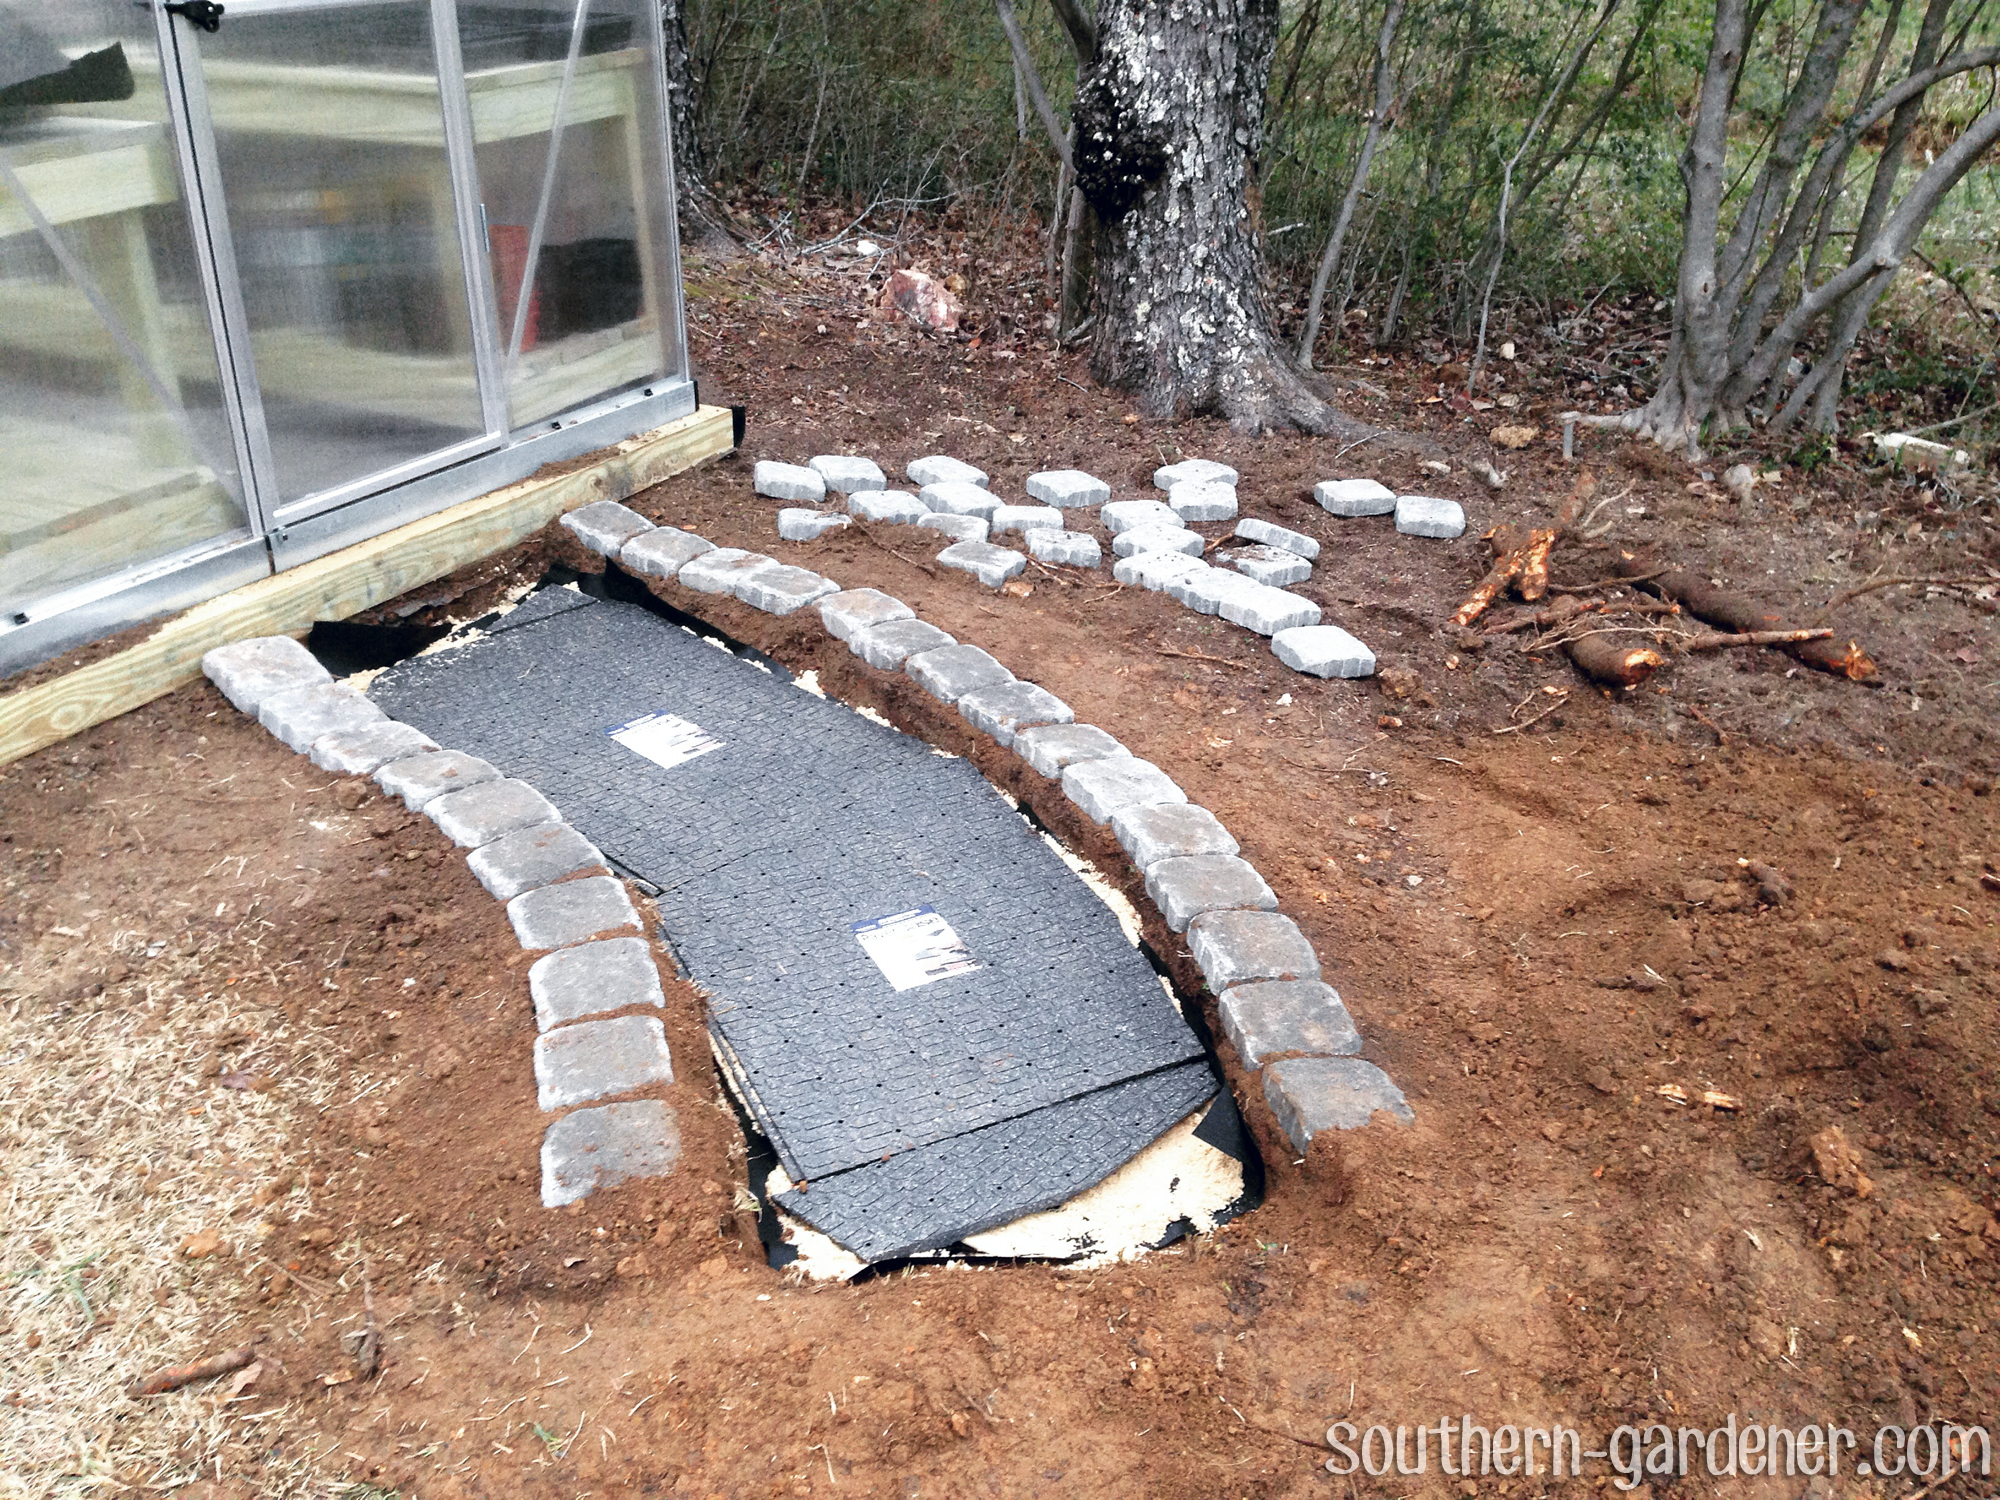
I didn't buy enough sand at showtime, and then it rained 2 days, and then I had to expect iv days before I could go out at that place and stop the sand-leveling function. This is ane of the steps I shouldn't have skipped, but I didn't want to purchase a 10-foot slice of PVC considering I don't have anywhere to actually store it one time I finished with it. So I but eyeballed the sand leveling, putting the paver bases on height to see where more sand needed to be added. This is not platonic because it takes forever. Did I mention I hate leveling things?
One time I had the pavers on the paver base, I decided to utilize paver edging so the edges would be nice and bang-up, especially when I filled in the gaps with articulation sand. I realized I would take to dig out more on each side to make room for the edging. FYI, this paver edging was such a pain in the butt. I mean, I think I'd rather bargain with the tree roots once again! I got so mad with the right side piece, I would have thrown it and bankrupt it if it was fragile. 😡
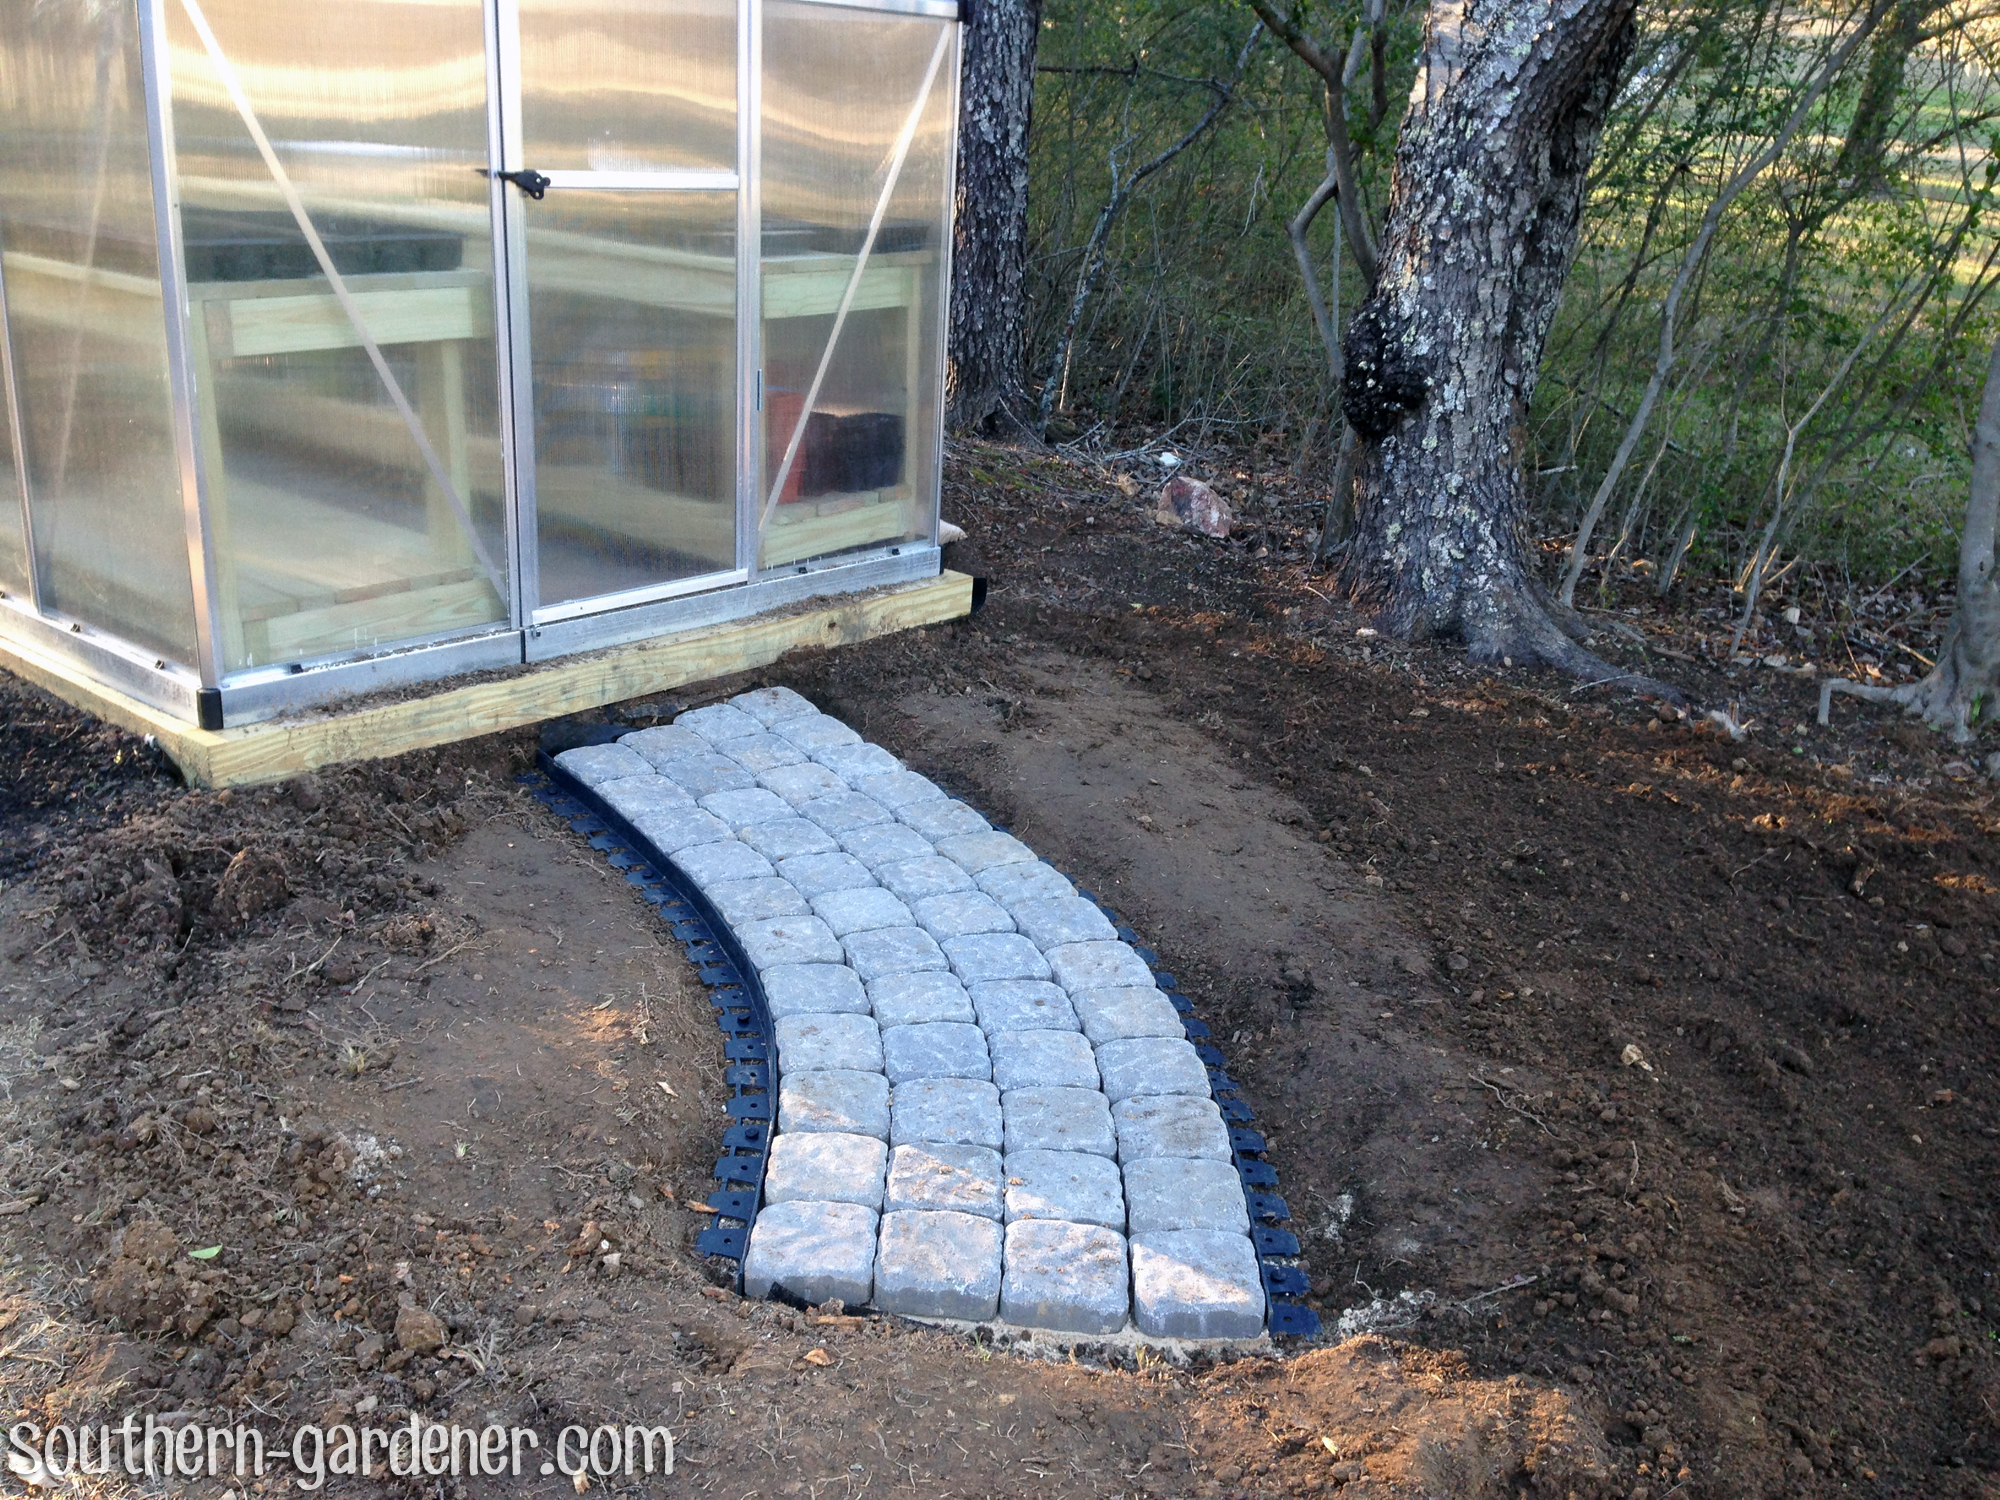
It wouldn't exist and then bad if the walkway was directly, simply even afterwards cutting the edging like it says for curves, I still struggled with it on the correct side in particular. That side was a little lower than the bodily pavers, but after fussing with information technology for an hour, I didn't care anymore. I wanted information technology to exist Done. It'southward good plenty for me.
The left side wasn't every bit difficult and looked a lot more even, give thanks goodness, since it's the side that will be most visible.

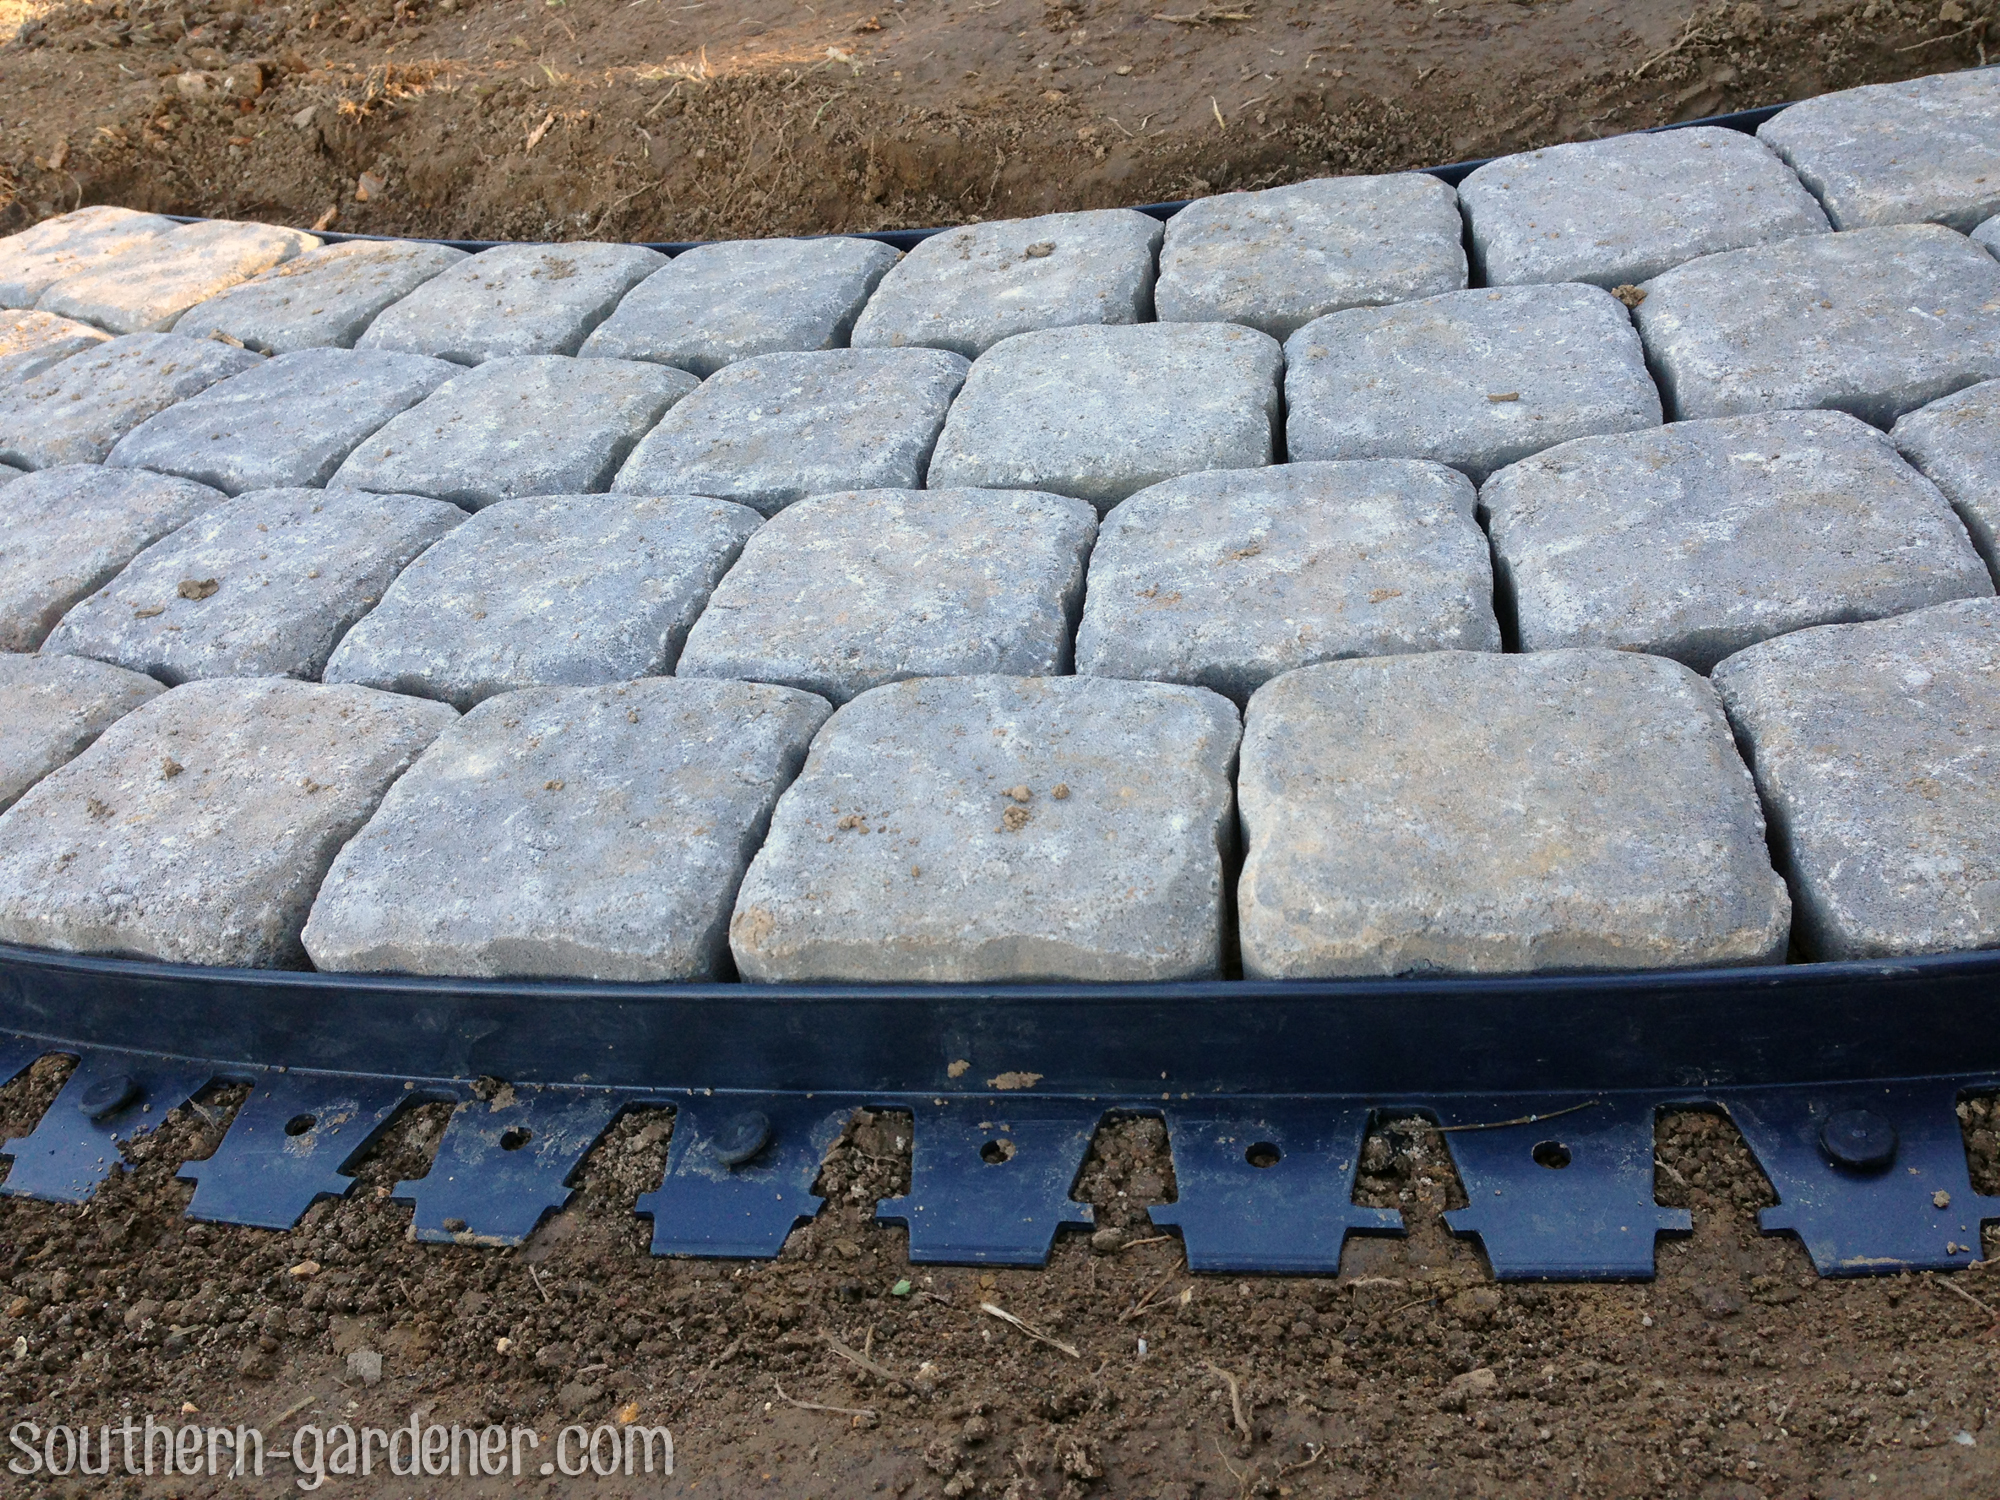
Then came the jointing sand. I promise I did this role well enough. One time the sand is in the cracks and yous've used a leaf blower to lightly blow off whatever remaining sand on top of the pavers, you are supposed to lightly wet it a niggling at a time and so it soaks into the sand actually skillful without puddling on top (or else the instructions say information technology will stain the pavers). Unfortunately, since you lot have to slightly level it abroad from the construction, the water ran off faster closest to the greenhouse. I just hope it got soaked in good enough at that part so the entire depth of the sand hardened. But I love how it looks with the sand filling in all the cracks!
Next, I intend to make a step with the aforementioned pavers at the greenhouse door.
Save
Salve

Source: https://southern-gardener.com/2017/03/diy-paver-walkway/
Posted by: madrigalhiscon.blogspot.com
0 Response to "How To Install A Curved Paver Walkway"
Post a Comment